

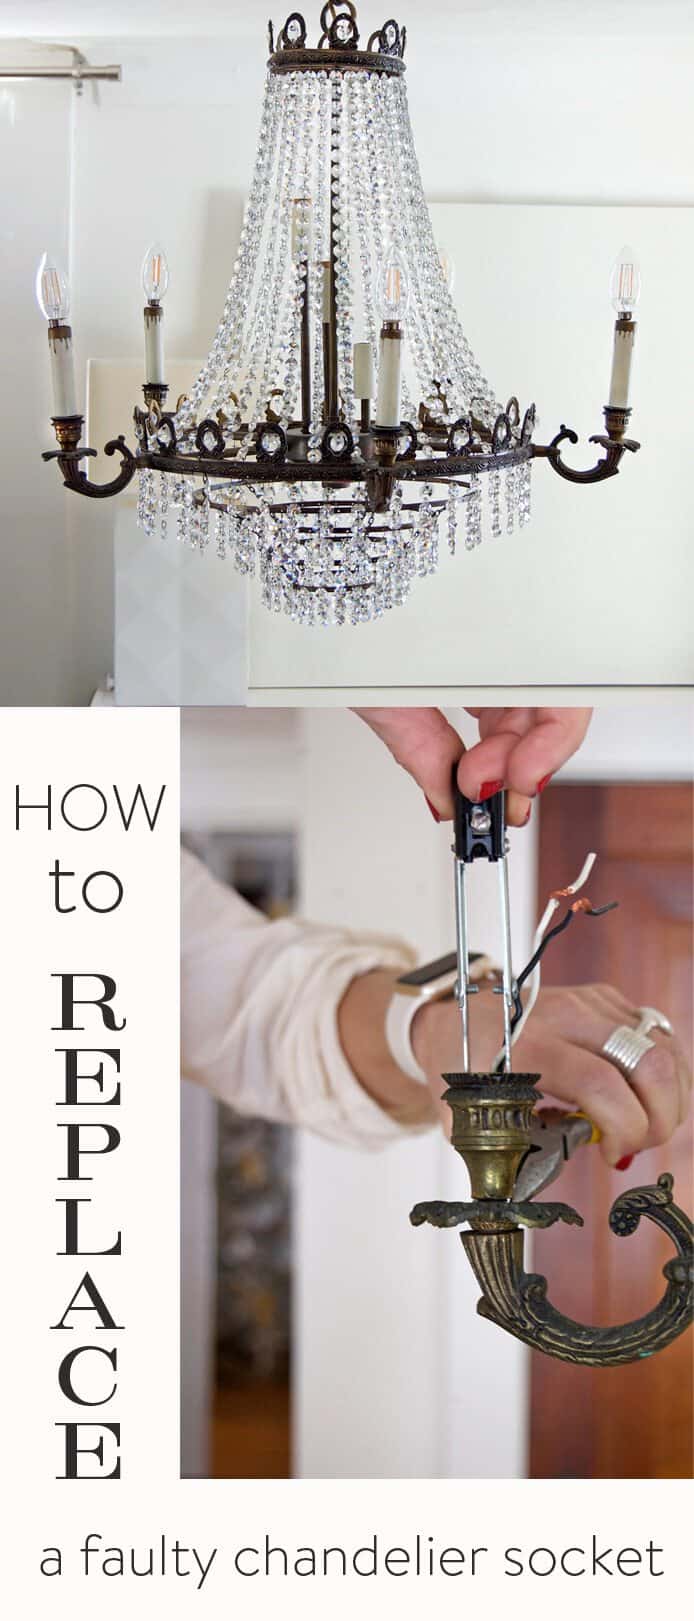
How To Repair A Chandelier
Once upon a fourth dimension in a land far, far away, a girl named Karen had a lightbulb moment. What would life exist like if she owned a sparkly chandelier? The chandelier of her dreams? Would she be happier? And smarter? And would money and math and maybe even monkeys come more than hands to her? If there was even a chance, she had to give it a shot.
She spent months scouring the most common places to find a sparkly chandelier; antiquarian stalls, flea markets, newspaper ads and hotel lobbies. Simply they were either likewise expensive, too dilapidated or also difficult to get at without the utilize of scaffolding and a stun gun.
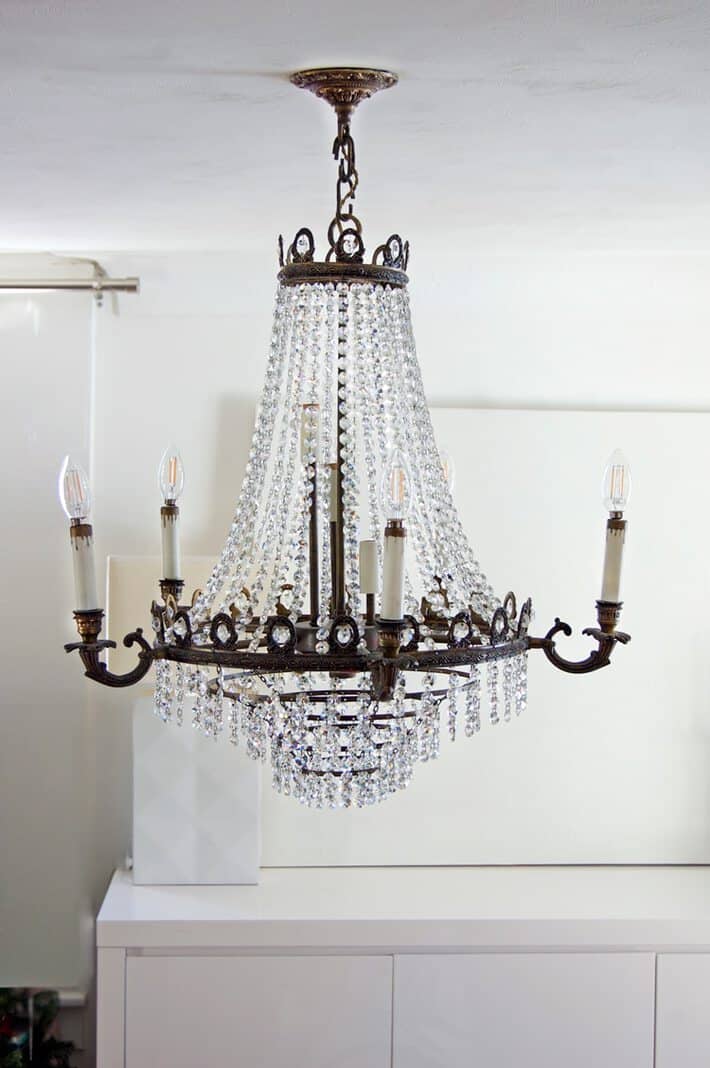
And then one mean solar day, on a whim, she sat down on her couch (which she often accidentally spells every bit coach) and started searching the local for sale ads on her computer. BANG. Right out of the gates there was not only a sparkly chandelier, simply information technology was the chandelier of her dreams AND it was but $100. She bought it immediately and started dreaming of the life that would soon exist hers. Sitting on her pile of money, calculating complex math bug in her head while watching herds of monkeys ramble into her firm to behold the beauty of the sparkly chandelier.
She spent days putting it together and cleaning and hanging information technology in the exact right spot. She lovingly screwed bulbs into most of the sockets (not all of them, because there were like, 700 sockets in this sucker and she wasn't trying to land planes here, just add together some pretty mood lighting) and in a moment of ceremony flicked the switch.
At which point there was a big blindside and all the lights in the room went out. Peering over at her dimmer switch it appeared to be gently smoking. And not in a adept, subsequently sex, I'm so satisfied way.

Yup. That $100 deal of a chandelier I got off of Kijiji this fall was a chip faulty. Get figure. Afterward crying and banging my fists on my head, cartoon-mode, I took a look at the chandelier I institute it wasn't a huge problem. Sure it tripped the breaker, certain it completely blew out my dimmer switch and sure I still couldn't practice math, but … information technology was an easy fix.
What happened was one of the chandelier arm sockets was blown out. It seemed to have some metal from the lesser of an old low-cal bulb burned and melted into it. Which in turn alarmed the sensitive and attractive chandelier when I turned information technology on forcing it to cocky destruct before my entire house burned downwards.
And then really, it was quite a thoughtful chandelier.
The fix? Replace the socket.
Total price? About $5. Full time to fix? Near five minutes.
STEP By STEP INSTRUCTIONS

- Plough the power off to the calorie-free if it's wired upwardly.
- Remove the plastic candle looking cover.
- Remove the cardboard insulator. (both of these things just slide off)

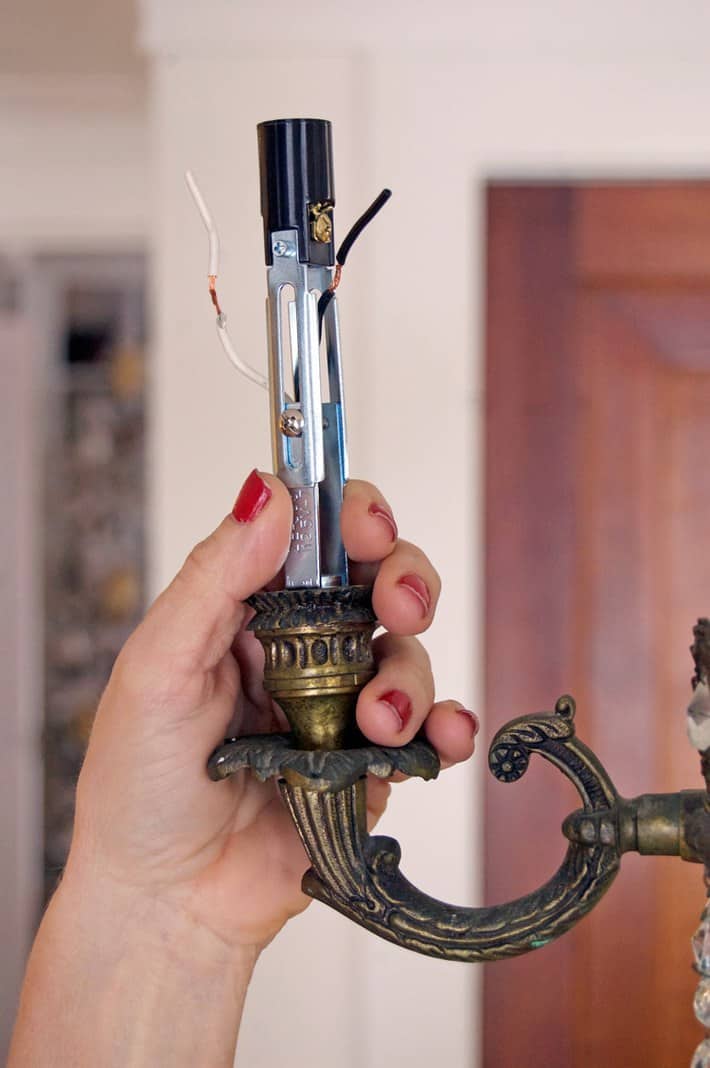
4. Take hold of your new chandelier socket.They come in two sizes so make sure you lot get the right size. I bought mine at a local hardware store then they're not hard to find but you tin likewise social club them on Amazon.
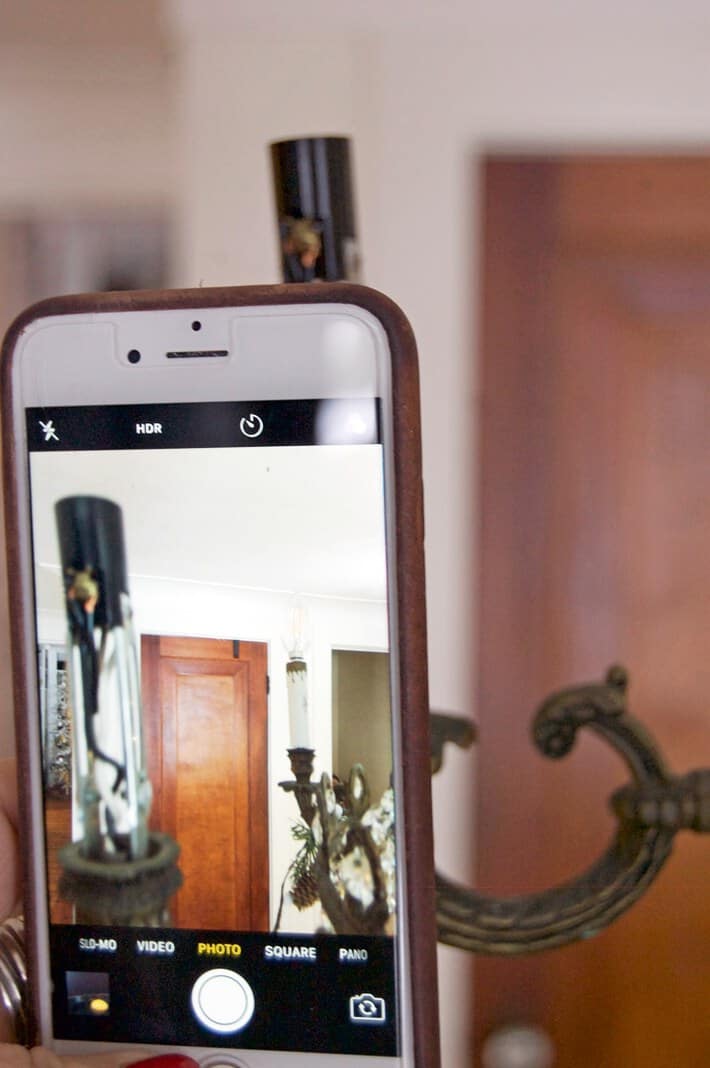
5. Take a photo of the socket BEFORE you start undoing any wiring. You call back you'll remember where everything goes only you might not. Taking a quick photo is the easiest way to avert mistakes.
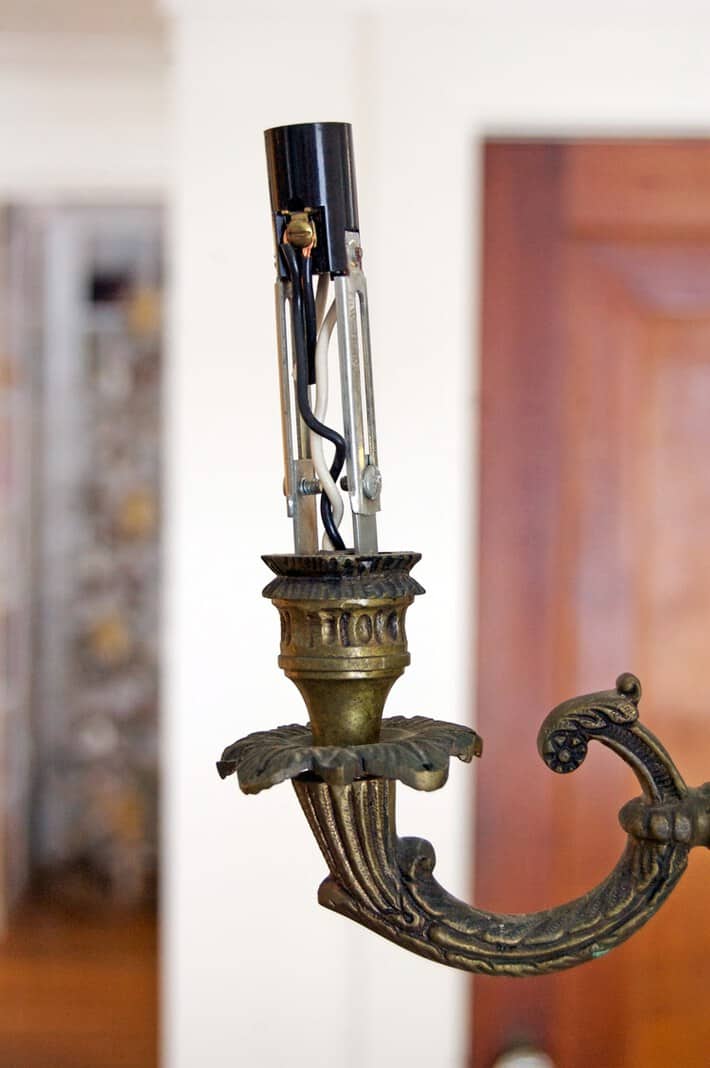
half dozen. There are only two wires. A blackness and a white that attach to the elevation of the socket.
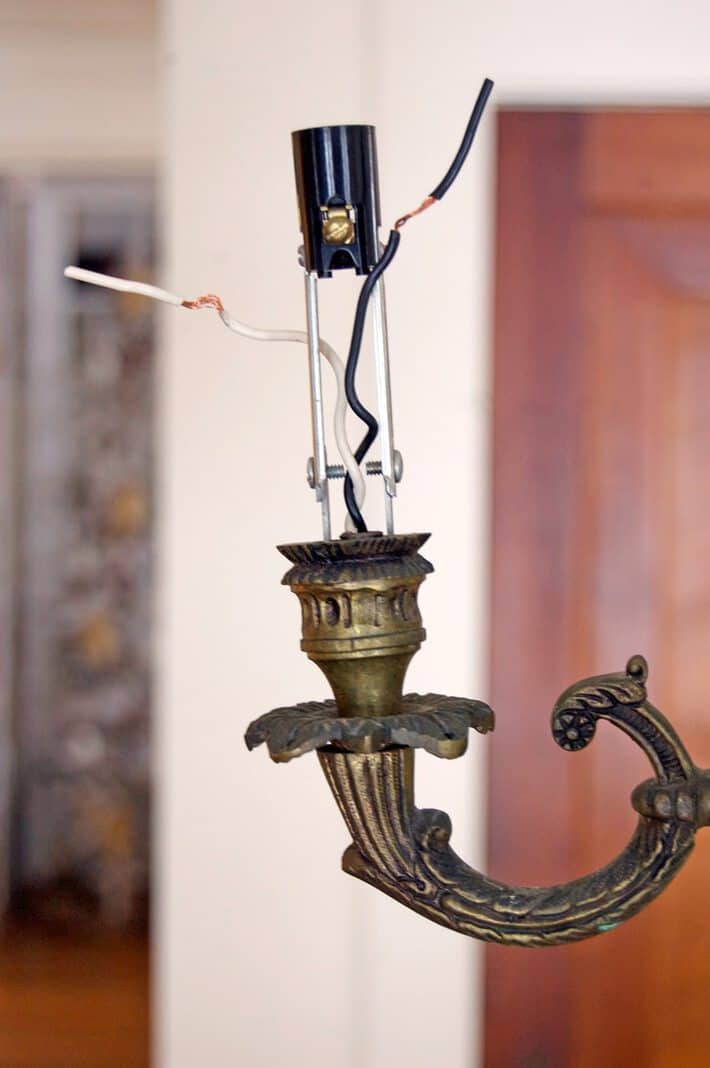
7. Using a screwdriver loosen the screws the wires are wound effectually and remove the wires from the one-time socket.
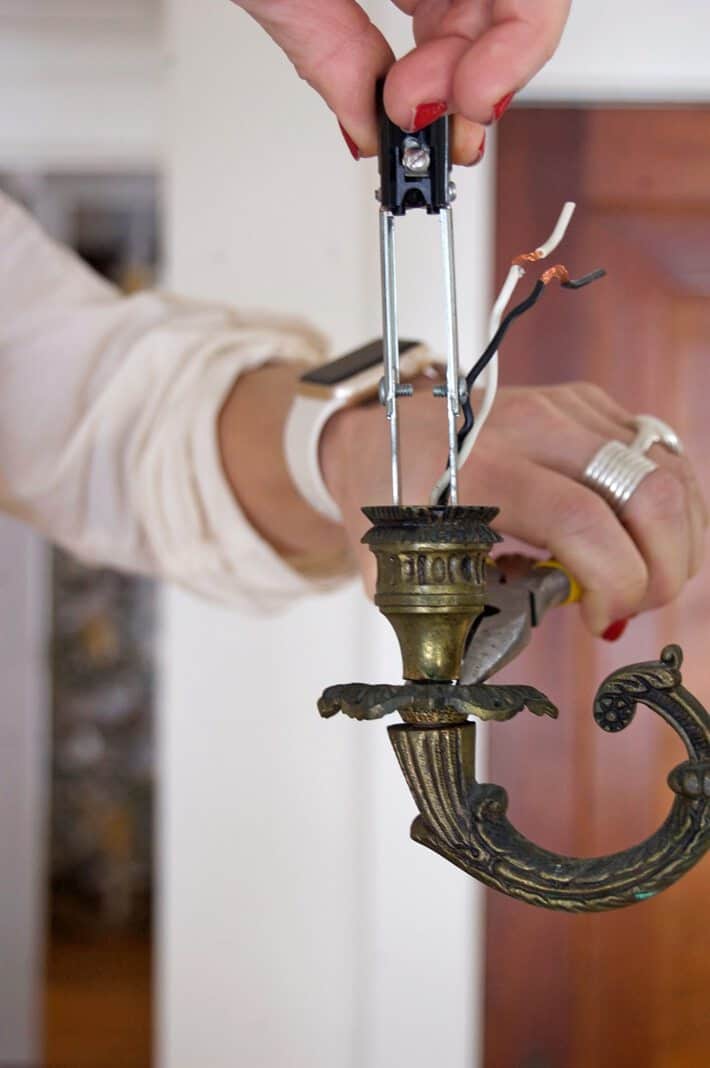
8. Remove the quondam socket. It just unscrews. You might demand to use some pliers to concord the base so you're only unscrewing the socket not the entire rod information technology's threaded onto.
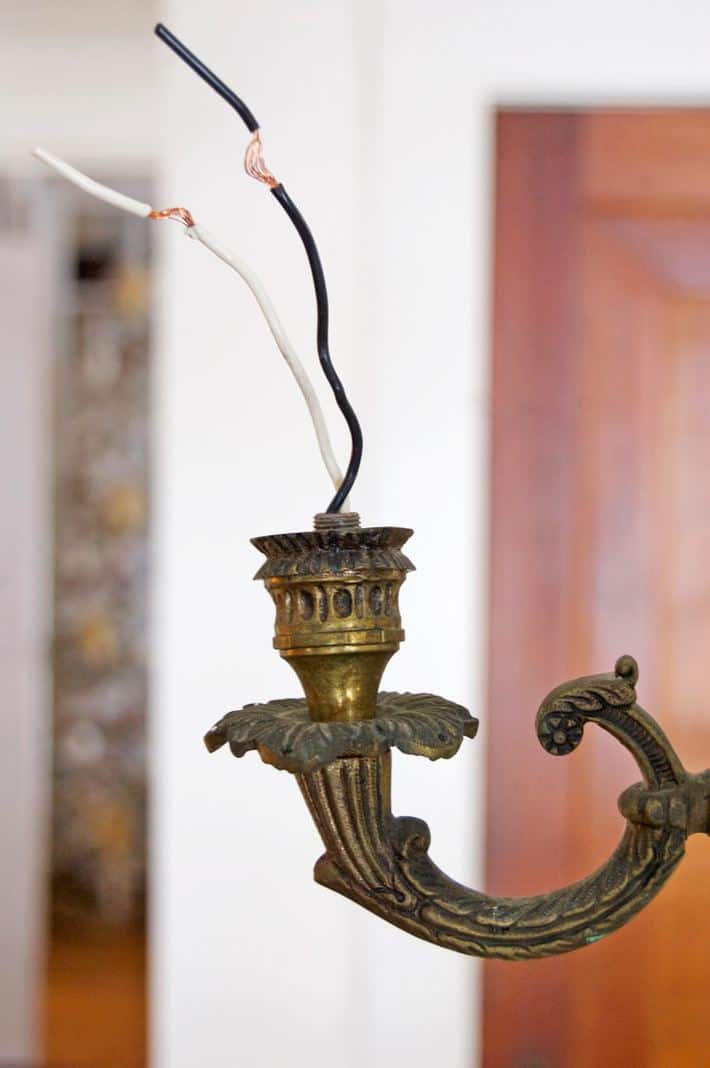
9. Ta da. Naked wires. Time for the new socket.
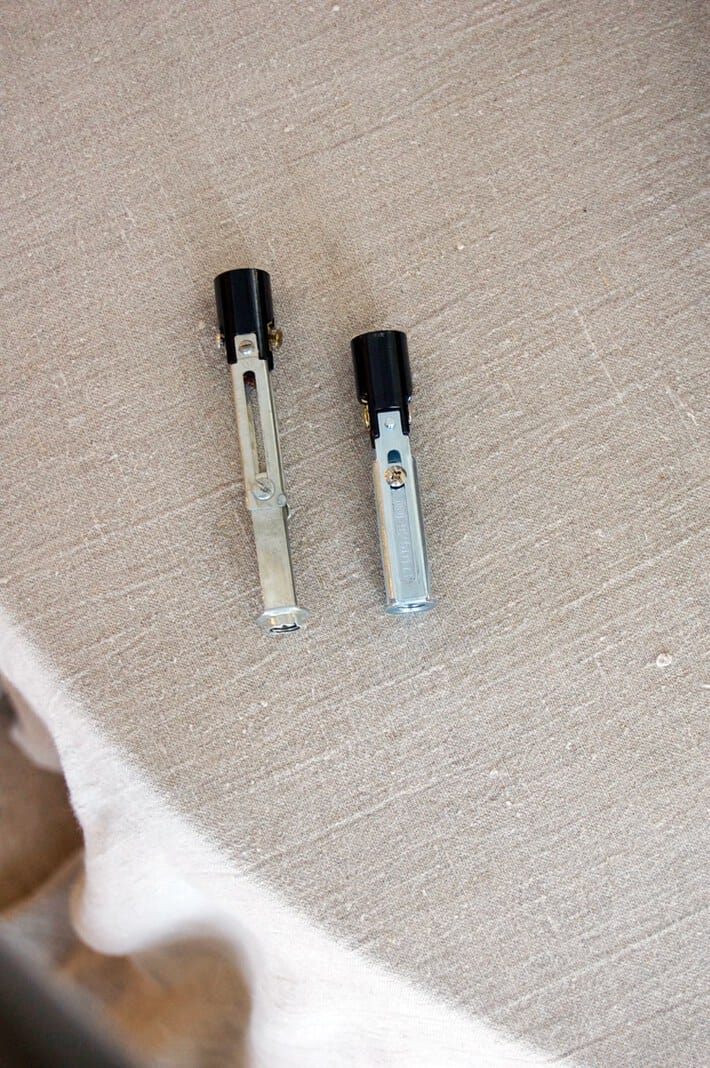
10. Like I said the sockets are adjustable. They just slide upward and down. You tin can see the old socket on the left and the new socket (which hasn't been adjusted to the right summit even so) on the right.
11. Screw the new socket into place with the wires coming into the middle of the socket.
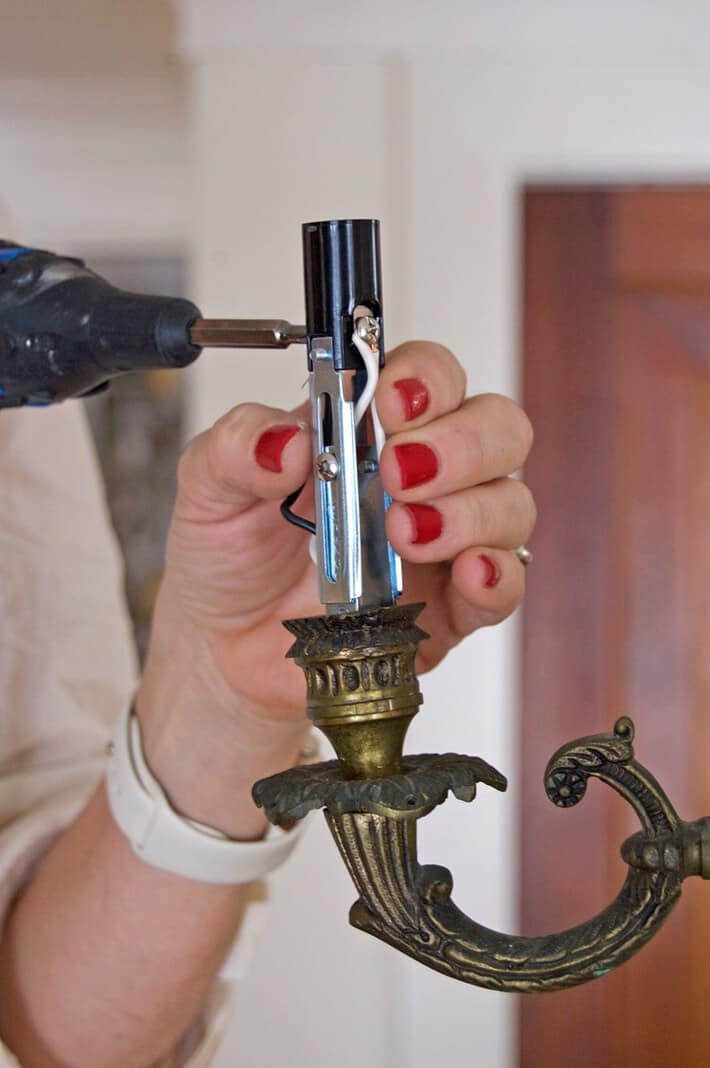
12. Reattach the wires to their appropriate screws. In this instance the black wire goes to the contumely screw (think black to brass) and the white wire goes to the argent screw.
TIP
Socket wiring
Black to Brass screw
White to Silvery screw

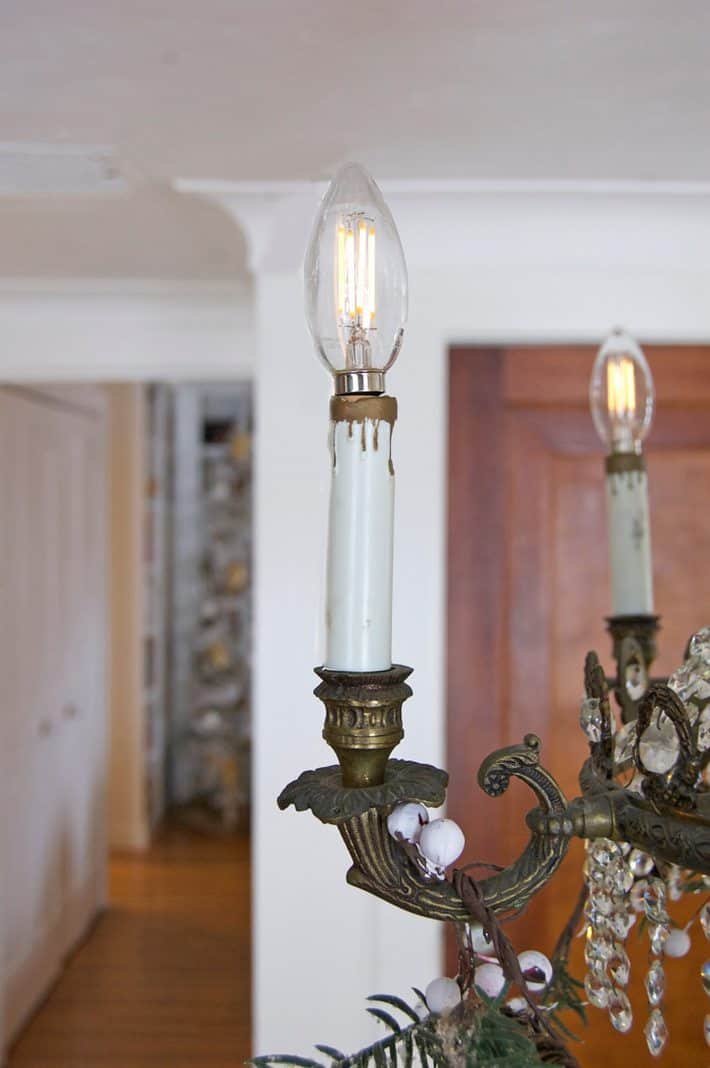
13. Slide the cardboard insulator and plastic cover on again.
fourteen. Plow the power back on.
fifteen. Purchase monkey food.
Source: https://www.theartofdoingstuff.com/chandelier-repair/
0 Response to "How To Repair A Chandelier"
Post a Comment